Code Like a Pythonista: Idiomatic Python
In this interactive tutorial, we'll cover many essential Python idioms and techniques in depth, adding immediately useful tools to your belt.
There are 3 versions of this presentation:
©2006-2008, licensed under a Creative Commons Attribution/Share-Alike (BY-SA) license.
My credentials: I am
- a resident of Montreal,
- father of two great kids, husband of one special woman,
- a full-time Python programmer,
- author of the Docutils project and reStructuredText,
- an editor of the Python Enhancement Proposals (or PEPs),
- an organizer of PyCon 2007, and chair of PyCon 2008,
- a member of the Python Software Foundation,
- a Director of the Foundation for the past year, and its Secretary.
In the tutorial I presented at PyCon 2006 (called Text & Data Processing), I was surprised at the reaction to some techniques I used that I had thought were common knowledge. But many of the attendees were unaware of these tools that experienced Python programmers use without thinking.
Many of you will have seen some of these techniques and idioms before. Hopefully you'll learn a few techniques that you haven't seen before and maybe something new about the ones you have already seen.
The Zen of Python (1)
These are the guiding principles of Python, but are open to interpretation. A sense of humor is required for their proper interpretation.
If you're using a programming language named after a sketch comedy troupe, you had better have a sense of humor.
Beautiful is better than ugly.Explicit is better than implicit.Simple is better than complex.Complex is better than complicated.Flat is better than nested.Sparse is better than dense.Readability counts.Special cases aren't special enough to break the rules.Although practicality beats purity.Errors should never pass silently.Unless explicitly silenced....
The Zen of Python (2)
In the face of ambiguity, refuse the temptation to guess.There should be one—and preferably only one—obvious way to do it.Although that way may not be obvious at first unless you're Dutch.Now is better than never.Although never is often better than right now.If the implementation is hard to explain, it's a bad idea.If the implementation is easy to explain, it may be a good idea.Namespaces are one honking great idea—let's do more of those!—Tim Peters
This particular "poem" began as a kind of a joke, but it really embeds a lot of truth about the philosophy behind Python. The Zen of Python has been formalized in PEP 20, where the abstract reads:
Long time Pythoneer Tim Peters succinctly channels the BDFL's guiding principles for Python's design into 20 aphorisms, only 19 of which have been written down.
You can decide for yourself if you're a "Pythoneer" or a "Pythonista". The terms have somewhat different connotations.
When in doubt:
import this
Try it in a Python interactive interpreter:
>>> import this
Here's another easter egg:
>>> from __future__ import braces
  File "<stdin>", line 1
SyntaxError: not a chance
What a bunch of comedians! :-)
Coding Style: Readability Counts
Programs must be written for people to read, and only incidentally for machines to execute.
—Abelson & Sussman, Structure and Interpretation of Computer Programs
PEP 8: Style Guide for Python Code
Worthwhile reading:
http://www.python.org/dev/peps/pep-0008/
PEP = Python Enhancement Proposal
A PEP is a design document providing information to the Python community, or describing a new feature for Python or its processes or environment.
The Python community has its own standards for what source code should look like, codified in PEP 8. These standards are different from those of other communities, like C, C++, C#, Java, VisualBasic, etc.
Because indentation and whitespace are so important in Python, the Style Guide for Python Code approaches a standard. It would be wise to adhere to the guide! Most open-source projects and (hopefully) in-house projects follow the style guide quite closely.
Whitespace 1
4 spaces per indentation level.
No hard tabs.
Never mix tabs and spaces.
This is exactly what IDLE and the Emacs Python mode support. Other editors may also provide this support.
One blank line between functions.
Two blank lines between classes.
Whitespace 2
- Add a space after "," in dicts, lists, tuples, & argument lists, and after ":" in dicts, but not before.
- Put spaces around assignments & comparisons (except in argument lists).
- No spaces just inside parentheses or just before argument lists.
- No spaces just inside docstrings.
def make_squares(key, value=0):
    """Return a dictionary and a list..."""
    d = {key: value}
    l = [key, value]
    return d, l
Naming
joined_lower for functions, methods, attributes
joined_lower or ALL_CAPS for constants
StudlyCaps for classes
camelCase only to conform to pre-existing conventions
Attributes: interface, _internal, __private
But try to avoid the __private form. I never use it. Trust me. If you use it, you WILL regret it later.
Explanation:
People coming from a C++/Java background are especially prone to overusing/misusing this "feature". But __private names don't work the same way as in Java or C++. They just trigger a name mangling whose purpose is to prevent accidental namespace collisions in subclasses: MyClass.__private just becomes MyClass._MyClass__private. (Note that even this breaks down for subclasses with the same name as the superclass, e.g. subclasses in different modules.) It is possible to access __private names from outside their class, just inconvenient and fragile (it adds a dependency on the exact name of the superclass).
The problem is that the author of a class may legitimately think "this attribute/method name should be private, only accessible from within this class definition" and use the __private convention. But later on, a user of that class may make a subclass that legitimately needs access to that name. So either the superclass has to be modified (which may be difficult or impossible), or the subclass code has to use manually mangled names (which is ugly and fragile at best).
There's a concept in Python: "we're all consenting adults here". If you use the __private form, who are you protecting the attribute from? It's the responsibility of subclasses to use attributes from superclasses properly, and it's the responsibility of superclasses to document their attributes properly.
It's better to use the single-leading-underscore convention, _internal. This isn't name mangled at all; it just indicates to others to "be careful with this, it's an internal implementation detail; don't touch it if you don't fully understand it". It's only a convention though.
There are some good explanations in the answers here:
Long Lines & Continuations
Keep lines below 80 characters in length.
Use implied line continuation inside parentheses/brackets/braces:
def __init__(self, first, second, third,
             fourth, fifth, sixth):
    output = (first + second + third
              + fourth + fifth + sixth)
Use backslashes as a last resort:
VeryLong.left_hand_side \
    = even_longer.right_hand_side()
Long Strings
>>> print 'o' 'n' "e"
one
The spaces between literals are not required, but help with readability. Any type of quoting can be used:
>>> print 't' r'\/\/' """o"""
t\/\/o
The string prefixed with an "r" is a "raw" string. Backslashes are not evaluated as escapes in raw strings. They're useful for regular expressions and Windows filesystem paths.
Note named string objects are not concatenated:
>>> a = 'three'
>>> b = 'four'
>>> a b
  File "<stdin>", line 1
    a b
      ^
SyntaxError: invalid syntax
That's because this automatic concatenation is a feature of the Python parser/compiler, not the interpreter. You must use the "+" operator to concatenate strings at run time.
text = ('Long strings can be made up '
        'of several shorter strings.')
The parentheses allow implicit line continuation.
Multiline strings use triple quotes:
"""Triple
double
quotes"""
'''\
Triple
single
quotes\
'''
Compound Statements
Good:
if foo == 'blah':
    do_something()
do_one()
do_two()
do_three()
Bad:
if foo == 'blah': do_something()
do_one(); do_two(); do_three()
Whitespace & indentations are useful visual indicators of the program flow. The indentation of the second "Good" line above shows the reader that something's going on, whereas the lack of indentation in "Bad" hides the "if" statement.
Multiple statements on one line are a cardinal sin. In Python, readability counts.
Docstrings & Comments
Docstrings = How to use code
Comments = Why (rationale) & how code works
Docstrings explain how to use code, and are for the users of your code. Uses of docstrings:
- Explain the purpose of the function even if it seems obvious to you, because it might not be obvious to someone else later on.
- Describe the parameters expected, the return values, and any exceptions raised.
- If the method is tightly coupled with a single caller, make some mention of the caller (though be careful as the caller might change later).
Comments explain why, and are for the maintainers of your code. Examples include notes to yourself, like:
# !!! BUG: ...

# !!! FIX: This is a hack

# ??? Why is this here?
Both of these groups include you, so write good docstrings and comments!
Docstrings are useful in interactive use (help()) and for auto-documentation systems.
False comments & docstrings are worse than none at all. So keep them up to date! When you make changes, make sure the comments & docstrings are consistent with the code, and don't contradict it.
There's an entire PEP about docstrings, PEP 257, "Docstring Conventions":
http://www.python.org/dev/peps/pep-0257/
Practicality Beats Purity
A foolish consistency is the hobgoblin of little minds.
—Ralph Waldo Emerson
(hobgoblin: Something causing superstitious fear; a bogy.)
There are always exceptions. From PEP 8:
But most importantly: know when to be inconsistent -- sometimes the style guide just doesn't apply. When in doubt, use your best judgment. Look at other examples and decide what looks best. And don't hesitate to ask!
Two good reasons to break a particular rule:
- When applying the rule would make the code less readable, even for someone who is used to reading code that follows the rules.
- To be consistent with surrounding code that also breaks it (maybe for historic reasons) -- although this is also an opportunity to clean up someone else's mess (in true XP style).
... but practicality shouldn't beat purity to a pulp!
Idiom Potpourri
A selection of small, useful idioms.
Now we move on to the meat of the tutorial: lots of idioms.
We'll start with some easy ones and work our way up.
Swap Values
In other languages:
temp = a
a = b
b = temp
In Python:
b, a = a, b
- The comma is the tuple constructor syntax.
- A tuple is created on the right (tuple packing).
- A tuple is the target on the left (tuple unpacking).
The right-hand side is unpacked into the names in the tuple on the left-hand side.
Further examples of unpacking:
>>> l =['David', 'Pythonista', '+1-514-555-1234']
>>> name, title, phone = l
>>> name
'David'
>>> title
'Pythonista'
>>> phone
'+1-514-555-1234'
Useful in loops over structured data:
l (L) above is the list we just made (David's info). So people is a list containing two items, each a 3-item list.
>>> people = [l, ['Guido', 'BDFL', 'unlisted']]
>>> for (name, title, phone) in people:
...     print name, phone
...
David +1-514-555-1234
Guido unlisted
Each item in people is being unpacked into the (name, title, phone) tuple.
Arbitrarily nestable (just be sure to match the structure on the left & right!):
>>> david, (gname, gtitle, gphone) = people
>>> gname
'Guido'
>>> gtitle
'BDFL'
>>> gphone
'unlisted'
>>> david
['David', 'Pythonista', '+1-514-555-1234']
More About Tuples
>>> 1,
(1,)
>>> (1,)
(1,)
>>> (1)
1
>>> ()
()
>>> tuple()
()
>>> value = 1,
>>> value
(1,)
Interactive "_"
This is a really useful feature that surprisingly few people know.
In the interactive interpreter, whenever you evaluate an expression or call a function, the result is bound to a temporary name, _ (an underscore):
>>> 1 + 1
2
>>> _
2
_ stores the last printed expression.
When a result is None, nothing is printed, so _ doesn't change. That's convenient!
This only works in the interactive interpreter, not within a module.
It is especially useful when you're working out a problem interactively, and you want to store the result for a later step:
>>> import math
>>> math.pi / 3
1.0471975511965976
>>> angle = _
>>> math.cos(angle)
0.50000000000000011
>>> _
0.50000000000000011
Building Strings from Substrings
colors = ['red', 'blue', 'green', 'yellow']
Don't do this:
result = ''
for s in colors:
    result += s
This is very inefficient.
It has terrible memory usage and performance patterns. The "summation" will compute, store, and then throw away each intermediate step.
Instead, do this:
result = ''.join(colors)
The join() string method does all the copying in one pass.
When you're only dealing with a few dozen or hundred strings, it won't make much difference. But get in the habit of building strings efficiently, because with thousands or with loops, it will make a difference.
Building Strings, Variations 1
If you want spaces between your substrings:
result = ' '.join(colors)
Or commas and spaces:
result = ', '.join(colors)
Here's a common case:
colors = ['red', 'blue', 'green', 'yellow']
print 'Choose', ', '.join(colors[:-1]), \
      'or', colors[-1]
To make a nicely grammatical sentence, we want commas between all but the last pair of values, where we want the word "or". The slice syntax does the job. The "slice until -1" ([:-1]) gives all but the last value, which we join with comma-space.
Of course, this code wouldn't work with corner cases, lists of length 0 or 1.
Choose red, blue, green or yellow
Building Strings, Variations 2
If you need to apply a function to generate the substrings:
result = ''.join(fn(i) for i in items)
If you need to compute the substrings incrementally, accumulate them in a list first:
items = []
...
items.append(item)  # many times
...
# items is now complete
result = ''.join(fn(i) for i in items)
Use in where possible (1)
Good:
for key in d:
    print key
- in is generally faster.
- This pattern also works for items in arbitrary containers (such as lists, tuples, and sets).
- in is also an operator (as we'll see).
Bad:
for key in d.keys():
    print key
Use in where possible (2)
But .keys() is necessary when mutating the dictionary:
for key in d.keys():
    d[str(key)] = d[key]
For consistency, use key in dict, not dict.has_key():
# do this:
if key in d:
    ...do something with d[key]

# not this:
if d.has_key(key):
    ...do something with d[key]
Dictionary get Method
We often have to initialize dictionary entries before use:
navs = {}
for (portfolio, equity, position) in data:
    if portfolio not in navs:
        navs[portfolio] = 0
    navs[portfolio] += position * prices[equity]
dict.get(key, default) removes the need for the test:
navs = {}
for (portfolio, equity, position) in data:
    navs[portfolio] = (navs.get(portfolio, 0)
                       + position * prices[equity])
Dictionary setdefault Method (1)
Initializing mutable dictionary values:
equities = {}
for (portfolio, equity) in data:
    if portfolio in equities:
        equities[portfolio].append(equity)
    else:
        equities[portfolio] = [equity]
dict.setdefault(key, default) does the job much more efficiently:
equities = {}
for (portfolio, equity) in data:
    equities.setdefault(portfolio, []).append(
                                         equity)
dict.setdefault() is equivalent to "get, or set & get". Or "set if necessary, then get". It's especially efficient if your dictionary key is expensive to compute or long to type.
The only problem with dict.setdefault() is that the default value is always evaluated, whether needed or not. That only matters if the default value is expensive to compute.
If the default value is expensive to compute, you may want to use the defaultdict class, which we'll cover shortly.
Dictionary setdefault Method (2)
setdefault can also be used as a stand-alone statement:
navs = {}
for (portfolio, equity, position) in data:
    navs.setdefault(portfolio, 0)
    navs[portfolio] += position * prices[equity]
defaultdict
New in Python 2.5.
defaultdict is new in Python 2.5, part of the collections module. defaultdict is identical to regular dictionaries, except for two things:
- it takes an extra first argument: a default factory function; and
- when a dictionary key is encountered for the first time, the default factory function is called and the result used to initialize the dictionary value.
There are two ways to get defaultdict:
import the collections module and reference it via the module,
➔
or import the defaultdict name directly:
➔
import collections
d = collections.defaultdict(...)
from collections import defaultdict
d = defaultdict(...)
from collections import defaultdict

equities = defaultdict(list)
for (portfolio, equity) in data:
    equities[portfolio].append(equity)
There's no fumbling around at all now. In this case, the default factory function is list, which returns an empty list.
This is how to get a dictionary with default values of 0: use int as a default factory function:
navs = defaultdict(int)
for (portfolio, equity, position) in data:
    navs[portfolio] += position * prices[equity]
Building & Splitting Dictionaries
given = ['John', 'Eric', 'Terry', 'Michael']
family = ['Cleese', 'Idle', 'Gilliam', 'Palin']
pythons = dict(zip(given, family))
>>> pprint.pprint(pythons)
{'John': 'Cleese',
 'Michael': 'Palin',
 'Eric': 'Idle',
 'Terry': 'Gilliam'}
>>> pythons.keys()
['John', 'Michael', 'Eric', 'Terry']
>>> pythons.values()
['Cleese', 'Palin', 'Idle', 'Gilliam']
Testing for Truth Values
# do this:        # not this:
if x:             if x == True:
    pass              pass
Testing a list:
# do this:        # not this:
if items:         if len(items) != 0:
    pass              pass

                  # and definitely not this:
                  if items != []:
                      pass
Truth Values
| False | True |
|---|---|
| False (== 0) | True (== 1) |
| "" (empty string) | any string but "" (" ", "anything") |
| 0, 0.0 | any number but 0 (1, 0.1, -1, 3.14) |
| [], (), {}, set() | any non-empty container ([0], (None,), ['']) |
| None | almost any object that's not explicitly False |
Example of an object's truth value:
>>> class C:
...  pass
...
>>> o = C()
>>> bool(o)
True
>>> bool(C)
True
(Examples: execute truth.py.)
To control the truth value of instances of a user-defined class, use the __nonzero__ or __len__ special methods. Use __len__ if your class is a container which has a length:
class MyContainer(object):

    def __init__(self, data):
        self.data = data

    def __len__(self):
        """Return my length."""
        return len(self.data)
If your class is not a container, use __nonzero__:
class MyClass(object):

    def __init__(self, value):
        self.value = value

    def __nonzero__(self):
        """Return my truth value (True or False)."""
        # This could be arbitrarily complex:
        return bool(self.value)
In Python 3.0, __nonzero__ has been renamed to __bool__ for consistency with the bool built-in type. For compatibility, add this to the class definition:
__bool__ = __nonzero__
Index & Item (1)
>>> items = 'zero one two three'.split()
>>> print items
['zero', 'one', 'two', 'three']
Say we want to iterate over the items, and we need both the item's index and the item itself:
                  - or -
i = 0
for item in items:      for i in range(len(items)):
    print i, item               print i, items[i]
    i += 1
Index & Item (2): enumerate
The enumerate function takes a list and returns (index, item) pairs:
>>> print list(enumerate(items))
[(0, 'zero'), (1, 'one'), (2, 'two'), (3, 'three')]
Our loop becomes much simpler:
for (index, item) in enumerate(items):
    print index, item
# compare:              # compare:
index = 0               for i in range(len(items)):
for item in items:              print i, items[i]
    print index, item
    index += 1
The enumerate version is much shorter and simpler than the version on the left, and much easier to read and understand than either.
An example showing how the enumerate function actually returns an iterator (a generator is a kind of iterator):
>>> enumerate(items)
<enumerate object at 0x011EA1C0>
>>> e = enumerate(items)
>>> e.next()
(0, 'zero')
>>> e.next()
(1, 'one')
>>> e.next()
(2, 'two')
>>> e.next()
(3, 'three')
>>> e.next()
Traceback (most recent call last):
  File "<stdin>", line 1, in ?
StopIteration
Other languages have "variables"
int a = 1; |
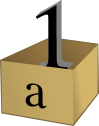
|
Box "a" now contains an integer 1.
Assigning another value to the same variable replaces the contents of the box:
a = 2; |
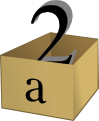
|
Now box "a" contains an integer 2.
Assigning one variable to another makes a copy of the value and puts it in the new box:
int b = a; |
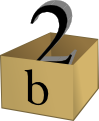
|
|
Python has "names"
a = 1 |

|
Here, an integer 1 object has a tag labelled "a".
If we reassign to "a", we just move the tag to another object:
a = 2 |

|

|
Now the name "a" is attached to an integer 2 object.
The original integer 1 object no longer has a tag "a". It may live on, but we can't get to it through the name "a". (When an object has no more references or tags, it is removed from memory.)
If we assign one name to another, we're just attaching another nametag to an existing object:
b = a |
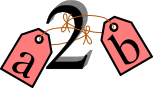
|
Although we commonly refer to "variables" even in Python (because it's common terminology), we really mean "names" or "identifiers". In Python, "variables" are nametags for values, not labelled boxes.
If you get nothing else out of this tutorial, I hope you understand how Python names work. A good understanding is certain to pay dividends, helping you to avoid cases like this:
Default Parameter Values
def bad_append(new_item, a_list=[]):
    a_list.append(new_item)
    return a_list
>>> print bad_append('one')
['one']
>>> print bad_append('two')
['one', 'two']
def good_append(new_item, a_list=None):
    if a_list is None:
        a_list = []
    a_list.append(new_item)
    return a_list
% String Formatting
Although if you don't know C, that's not very helpful. Basically, you provide a template or format and interpolation values.
In this example, the template contains two conversion specifications: "%s" means "insert a string here", and "%i" means "convert an integer to a string and insert here". "%s" is particularly useful because it uses Python's built-in str() function to to convert any object to a string.
The interpolation values must match the template; we have two values here, a tuple.
name = 'David'
messages = 3
text = ('Hello %s, you have %i messages'
        % (name, messages))
print text
Output:
Hello David, you have 3 messages
Advanced % String Formatting
By name with a dictionary:
values = {'name': name, 'messages': messages}
print ('Hello %(name)s, you have %(messages)i '
       'messages' % values)
Here we specify the names of interpolation values, which are looked up in the supplied dictionary.
Notice any redundancy? The names "name" and "messages" are already defined in the local namespace. We can take advantage of this.
By name using the local namespace:
print ('Hello %(name)s, you have %(messages)i '
       'messages' % locals())
The locals() function returns a dictionary of all locally-available names.
This is very powerful. With this, you can do all the string formatting you want without having to worry about matching the interpolation values to the template.
But power can be dangerous. ("With great power comes great responsibility.") If you use the locals() form with an externally-supplied template string, you expose your entire local namespace to the caller. This is just something to keep in mind.
To examine your local namespace:
>>> from pprint import pprint
>>> pprint(locals())
Advanced % String Formatting
By name using the instance namespace:
print ("We found %(error_count)d errors"
       % self.__dict__)
Equivalent to, but more flexible than:
print ("We found %d errors"
       % self.error_count)
List Comprehensions
The traditional way, with for and if statements:
new_list = []
for item in a_list:
    if condition(item):
        new_list.append(fn(item))
As a list comprehension:
new_list = [fn(item) for item in a_list
            if condition(item)]
For example, a list of the squares of 0–9:
>>> [n ** 2 for n in range(10)]
[0, 1, 4, 9, 16, 25, 36, 49, 64, 81]
A list of the squares of odd 0–9:
>>> [n ** 2 for n in range(10) if n % 2]
[1, 9, 25, 49, 81]
Generator Expressions (1)
As a loop:
total = 0
for num in range(1, 101):
    total += num * num
As a list comprehension:
total = sum([num * num for num in range(1, 101)])
As a generator expression:
total = sum(num * num for num in xrange(1, 101))
Generator expressions ("genexps") are just like list comprehensions, except that where listcomps are greedy, generator expressions are lazy. Listcomps compute the entire result list all at once, as a list. Generator expressions compute one value at a time, when needed, as individual values. This is especially useful for long sequences where the computed list is just an intermediate step and not the final result.
In this case, we're only interested in the sum; we don't need the intermediate list of squares. We use xrange for the same reason: it lazily produces values, one at a time.
Generator Expressions (2)
total = sum(num * num
            for num in xrange(1, 1000000000))
Rule of thumb:
- Use a list comprehension when a computed list is the desired end result.
- Use a generator expression when the computed list is just an intermediate step.
Here's a recent example I saw at work.
We needed a dictionary mapping month numbers (both as string and as integers) to month codes for futures contracts. It can be done in one logical line of code.
The way this works is as follows:
- The dict() built-in takes a list of key/value pairs (2-tuples).
- We have a list of month codes (each month code is a single letter, and a string is also just a list of letters). We enumerate over this list to get both the month code and the index.
- The month numbers start at 1, but Python starts indexing at 0, so the month number is one more than the index.
- We want to look up months both as strings and as integers. We can use the int() and str() functions to do this for us, and loop over them.
Recent example:
month_codes = dict((fn(i+1), code)
    for i, code in enumerate('FGHJKMNQUVXZ')
    for fn in (int, str))
month_codes result:
{ 1:  'F',  2:  'G',  3:  'H',  4:  'J', ...
 '1': 'F', '2': 'G', '3': 'H', '4': 'J', ...}
Sorting
a_list.sort()
(Note that the list is sorted in-place: the original list is sorted, and the sort method does not return the list or a copy.)
But what if you have a list of data that you need to sort, but it doesn't sort naturally (i.e., sort on the first column, then the second column, etc.)? You may need to sort on the second column first, then the fourth column.
We can use list's built-in sort method with a custom function:
def custom_cmp(item1, item2):
    return cmp((item1[1], item1[3]),
               (item2[1], item2[3]))

a_list.sort(custom_cmp)
Sorting with DSU *
DSU = Decorate-Sort-Undecorate
* Note: DSU is often no longer necessary. See the next section, Sorting With Keys for the new approach.
# Decorate:
to_sort = [(item[1], item[3], item)
           for item in a_list]

# Sort:
to_sort.sort()

# Undecorate:
a_list = [item[-1] for item in to_sort]
The first line creates a list containing tuples: copies of the sort terms in priority order, followed by the complete data record.
The second line does a native Python sort, which is very fast and efficient.
The third line retrieves the last value from the sorted list. Remember, this last value is the complete data record. We're throwing away the sort terms, which have done their job and are no longer needed.
Sorting With Keys
def my_key(item):
    return (item[1], item[3])

to_sort.sort(key=my_key)
The function my_key will be called once for each item in the to_sort list.
You can make your own key function, or use any existing one-argument function if applicable:
- str.lower to sort alphabetically regarless of case.
- len to sort on the length of the items (strings or containers).
- int or float to sort numerically, as with numeric strings like "2", "123", "35".
Generators
def my_range_generator(stop):
    value = 0
    while value < stop:
        yield value
        value += 1

for i in my_range_generator(10):
    do_something(i)
The yield keyword turns a function into a generator. When you call a generator function, instead of running the code immediately Python returns a generator object, which is an iterator; it has a next method. for loops just call the next method on the iterator, until a StopIteration exception is raised. You can raise StopIteration explicitly, or implicitly by falling off the end of the generator code as above.
Generators can simplify sequence/iterator handling, because we don't need to build concrete lists; just compute one value at a time. The generator function maintains state.
This is how a for loop really works. Python looks at the sequence supplied after the in keyword. If it's a simple container (such as a list, tuple, dictionary, set, or user-defined container) Python converts it into an iterator. If it's already an iterator, Python uses it directly.
Then Python repeatedly calls the iterator's next method, assigns the return value to the loop counter (i in this case), and executes the indented code. This is repeated over and over, until StopIteration is raised, or a break statement is executed in the code.
A for loop can have an else clause, whose code is executed after the iterator runs dry, but not after a break statement is executed. This distinction allows for some elegant uses. else clauses are not always or often used on for loops, but they can come in handy. Sometimes an else clause perfectly expresses the logic you need.
For example, if we need to check that a condition holds on some item, any item, in a sequence:
for item in sequence:
    if condition(item):
        break
else:
    raise Exception('Condition not satisfied.')
Example Generator
Filter out blank rows from a CSV reader (or items from a list):
def filter_rows(row_iterator):
    for row in row_iterator:
        if row:
            yield row

data_file = open(path, 'rb')
irows = filter_rows(csv.reader(data_file))
Reading Lines From Text/Data Files
datafile = open('datafile')
for line in datafile:
    do_something(line)
This is possible because files support a next method, as do other iterators: lists, tuples, dictionaries (for their keys), generators.
There is a caveat here: because of the way the buffering is done, you cannot mix .next & .read* methods unless you're using Python 2.5+.
EAFP vs. LBYL
It's easier to ask forgiveness than permission
Look before you leap
Duck typing
If it walks like a duck, and talks like a duck, and looks like a duck: it's a duck. (Goose? Close enough.)
Exceptions
Use coercion if an object must be a particular type. If x must be a string for your code to work, why not call
str(x)
instead of trying something like
isinstance(x, str)
EAFP try/except Example
try:
    return str(x)
except TypeError:
    ...
Importing
from module import *
You've probably seen this "wild card" form of the import statement. You may even like it. Don't use it.
To adapt a well-known exchange:
(Exterior Dagobah, jungle, swamp, and mist.)
LUKE: Is from module import * better than explicit imports?
YODA: No, not better. Quicker, easier, more seductive.
LUKE: But how will I know why explicit imports are better than the wild-card form?
YODA: Know you will when your code you try to read six months from now.
Wild-card imports are from the dark side of Python.
Never!
The from module import * wild-card style leads to namespace pollution. You'll get things in your local namespace that you didn't expect to get. You may see imported names obscuring module-defined local names. You won't be able to figure out where certain names come from. Although a convenient shortcut, this should not be in production code.
Moral: don't use wild-card imports!
It's much better to:
reference names through their module (fully qualified identifiers),
➔
import a long module using a shorter name (alias; recommended),
➔
or explicitly import just the names you need.
➔
Instead,
import module
module.name
import long_module_name as mod
mod.name
from module import name
name
Modules & Scripts
To make a simultaneously importable module and executable script:
if __name__ == '__main__':
    # script code here
When imported, a module's __name__ attribute is set to the module's file name, without ".py". So the code guarded by the if statement above will not run when imported. When executed as a script though, the __name__ attribute is set to "__main__", and the script code will run.
Except for special cases, you shouldn't put any major executable code at the top-level. Put code in functions, classes, methods, and guard it with if __name__ == '__main__'.
Module Structure
"""module docstring"""

# imports
# constants
# exception classes
# interface functions
# classes
# internal functions & classes

def main(...):
    ...

if __name__ == '__main__':
    status = main()
    sys.exit(status)
Command-Line Processing
Example: cmdline.py:
#!/usr/bin/env python

"""
Module docstring.
"""

import sys
import optparse

def process_command_line(argv):
    """
    Return a 2-tuple: (settings object, args list).
    `argv` is a list of arguments, or `None` for ``sys.argv[1:]``.
    """
    if argv is None:
        argv = sys.argv[1:]

    # initialize the parser object:
    parser = optparse.OptionParser(
        formatter=optparse.TitledHelpFormatter(width=78),
        add_help_option=None)

    # define options here:
    parser.add_option(      # customized description; put --help last
        '-h', '--help', action='help',
        help='Show this help message and exit.')

    settings, args = parser.parse_args(argv)

    # check number of arguments, verify values, etc.:
    if args:
        parser.error('program takes no command-line arguments; '
                     '"%s" ignored.' % (args,))

    # further process settings & args if necessary

    return settings, args

def main(argv=None):
    settings, args = process_command_line(argv)
    # application code here, like:
    # run(settings, args)
    return 0        # success

if __name__ == '__main__':
    status = main()
    sys.exit(status)
Packages
package/
    __init__.py
    module1.py
    subpackage/
        __init__.py
        module2.py
- Used to organize your project.
- Reduces entries in load-path.
- Reduces import name conflicts.
Example:
import package.module1
from package.subpackage import module2
from package.subpackage.module2 import name
In Python 2.5 we now have absolute and relative imports via a future import:
from __future__ import absolute_import
I haven't delved into these myself yet, so we'll conveniently cut this discussion short.
Simple is Better Than Complex
Debugging is twice as hard as writing the code in the first place. Therefore, if you write the code as cleverly as possible, you are, by definition, not smart enough to debug it.
—Brian W. Kernighan, co-author of The C Programming Language and the "K" in "AWK"
Don't reinvent the wheel
Check Python's standard library.
Check the Python Package Index (the "Cheese Shop"):
Search the web. Google is your friend.
References
- "Python Objects", Fredrik Lundh, http://www.effbot.org/zone/python-objects.htm
- "How to think like a Pythonista", Mark Hammond, http://python.net/crew/mwh/hacks/objectthink.html
- "Python main() functions", Guido van Rossum, http://www.artima.com/weblogs/viewpost.jsp?thread=4829
- "Python Idioms and Efficiency", http://jaynes.colorado.edu/PythonIdioms.html
- "Python track: python idioms", http://www.cs.caltech.edu/courses/cs11/material/python/misc/python_idioms.html
- "Be Pythonic", Shalabh Chaturvedi, http://www.cafepy.com/article/be_pythonic/ (PDF version)
- "Python Is Not Java", Phillip J. Eby, http://dirtsimple.org/2004/12/python-is-not-java.html
- "What is Pythonic?", Martijn Faassen, http://faassen.n--tree.net/blog/view/weblog/2005/08/06/0
- "Sorting Mini-HOWTO", Andrew Dalke, http://wiki.python.org/moin/HowTo/Sorting
- "Python Idioms", http://www.gungfu.de/facts/wiki/Main/PythonIdioms
- "Python FAQs", http://www.python.org/doc/faq/